When you click on a page, scroll past this week's featured photo to view.

WELCOME!

This site is dedicated to sharing what we have learned with you! Enjoy our tutorials, and if you have a question please feel free to ask! I know one of our sugar enthusiasts will either know or try to find the answer.
We all have something to share...and we all have something to learn!


___________________________________________________________


Nothing says Irish like Beautiful Lace

Nothing says Irish like Beautiful Lace
Click on photo for Earlene Moore's tutorial for beautiful fondant lace and have fun with your next cake!


.............................................................................................................................

/////////////////////////////////////////////////////////////////
.............................................................................................................................


Monday, January 25, 2010

A Snowflake is Winter's Butterfly

I love that quote!

 In that spirit, I decided to make my own snowflakes out of  poured sugar- Isomalt- to be more specific.

The supplies I used were 1 cup of Isomalt crystals, a small saucepan, a rubber snowflake mold, a spoon, non-stick spray and a small bowl of ice water ( in case of burn injury!)

Isomalt is interesting. I had used it once before and learned quickly about its properities ( idiosyncrasies, if you will) at about 3am in the morning before a 9am scheduled cake delivery! Having waded through a barrage of mistakes, making the snowflakes on this go round was a bit easier.

I started by spraying a rubber snowflake mold* ( the kind used to make maple candy ) with non-stick spray.
Then I dabbed the inside of the molds with a paper towel to make sure there was no puddling of the spray anywhere. This is important! Any pooling of the nonstick spray will literally sizzle and cook when you pour the Isomalt on it and you will have to discard your candy. I know this for a fact. :-(

Then I poured about a cup (or so- I didn't measure) of Isomalt into a stainless steel saucepan. I put my candy thermometer in place and, without adding water, began heating the crystals over low heat; stirring as it began to melt down.

Once melted, the sugar begans to heat quickly and before you even notice it is boiling, the candy thermomter will register 356 F or 180 C.

Isomalt heats very quickly. Do not turn your back on it. Do not blink!
However, it is more forgiving than sugar because it maintains its clear properties as it approaches the hard crack stage of cooking, whereas sugar turns a nice amber color.


Quickly remove from heat and with spoon, carefully ladle into the mold. Watch your hands as you do this to avoid burning yourself on the pan. ( Ask me how I know )

Wait until the candy snowflakes completely harden. Pull the mold away from the snowflakes.

 For more definition, I brushed some with SuperPearl edible dust or sprinkled with edible disco dust for sparkle.


There you have it. Easy Poured Sugar Snowflakes!
Let it snow, let it snow, let it snow!!


Photograhy and Tutorial by Jacque Benson 2010- All rights reserved
This material may not be republished or reproduced in any manner without the expressed permission of the author.

Monday, January 18, 2010

Remy Stirs the Pot


Hello Sugar Friends!


 I thought I would show this cute cake I made a few months back for the daughter of a friend. She was having her party at one of those little chef places, so the theme of the cake was just perfect!

When the mom asked me if I could make Remy stirring the soup pot like in the movie, I said sure I can! Then of course, after I hung up the phone, my thought was : How the heck am I going to do that? The pot I can do, but figure modeling is not my strong suit. So I just jumped in and went for it.


I used a real chopping board for the cake base, and I love the effect that gave.


Here is the first body parts of Remy drying. I find this image quite disturbing. He scares me. But not as much as possums.


I put on his face and arms, and then used a bubble tea straw to simulate the spoon he would be holding on the real cake.


Hands make holding the spoon a tad easier for him. His little chef hat makes him official!


Here he is drying so he would have the proper body position for the cake. He no longer scares me. I think he is pretty dern cute now.


Here are 3 layers of cake iced with thickened ganache as I described in this post.


Here are the pot handles drying. An Aussie friend gave me the idea to use aquarium air tubing wrapped in fondant. I taped them down to the table so they would dry in the proper curve. I have no idea if that is food safe, so do some research before you do this.


Here I am working on the cheese and veggies, all made of fondant with tylose.


Cute little carrots.


Swiss and aged Gouda. Tee hee.


I wrapped the cake in white fondant, added the top trim and the handles, and then airbrushed it with copper luster dust. Buttercream makes the soup, with little fondant veggies sprinkled on top.


Despite using the straw to configure his arms, when I put the real spoon in the cake, I could not get it to line up with his hands correctly. After a few choice words, I just decided that he was shifting the spoon from one hand to the other, and my picture caught it mid-shift. Yep, I like that story.


I also chose to ignore the fact that he is walking on the soup more than he is standing on the edge of the pot. (Rat bastard.)

Sometimes things just don't go as we plan, and we have to suck it up. I hate when that happens.


But overall, I was very pleased with the cake, and mom and daughter went crazy over it. Mission accomplished!


**************************************************
 
Tutorial and Photography by Sharon Zambito. All Rights Reserved. 2009
This tutorial was used with the expressed permission of Sharon Zambito. Content of this post may not be reproduced in any form without written consent of the author.

Monday, January 11, 2010

Let's talk about Color!

This is just a simple post-- but with so many food colors on the market,
a lot of people never know for sure how to obtain certain hues.

For instance, the other day, a student of mine asked me how to achieve
the blue of the Tiffany boxes.

I just use teal and works great for me.

Here is a color chart to help with some colors.


Color Chart


ANTIQUE GOLD: Add just an extremely small touch of Leaf Green to golden yellow

APRICOT: 2 parts Orange, 1 part Golden Yellow

AQUA: Sky Blue and Leaf Green

AVOCADO: Use Moss Green color or 4 parts Lemon Yellow, 1 part Leaf Green, Touch of Black

BLACK: Our paste color or Royal Blue, Christmas Red, Orange and Lemon Or
                mix left over color icing together, then add Black

BRICK RED: Red and Brown

BURGUNDY: 5 parts Rose Pink, 1 part Violet

CHARTREUSE: 9 parts Lemon Yellow, 1 part Leaf Green

COPPER: 1 part Golden Yellow, 1 part Brown, 1 part Christmas Red

CORAL: Watermelon makes a very attractive coral color. Or bright Creamy Peach
              Or 3 parts Rose Pink, 2 parts Lemon Yellow

DUSTY ROSE: 5 parts Rose Pink, 1 part Violet

EGGPLANT: Mix Navy Blue into the amount of icing you are going to use for your project.
                      Then mix Super Red into a smaller amount of icing. Add the Super Red icing
                       to the Navy Blue icing until you get the eggplant color you want.
                      You can also try it with Royal Blue instead of Navy Blue, depending on the
                      shade of eggplant that you want.

FLESH: Add just an extremely small touch of Copper to white icing.
             Ivory can also be used. Light pink with a small amount of brown

GOLD: 10 parts Lemon Yellow, 3 parts Orange, 1 part Red

GRAPE: 1 part Sky Blue, 6 parts Rose Pink

GRAY: Add just a touch of Black to white icing

HUNTER GREEN: Kelly Green and a touch of black

IVORY: Use Ivory paste

JADE: Leaf green, royal blue and a touch of black

LAVENDER: Pink and violet Or 5 parts Pink, 1 part Violet

MARIGOLD: Lemon Yellow and orange

MAROON: Burgundy and Red Red Or 4 parts Red Red, 2 parts Burgundy

MAUVE: Touch of Burgundy with very little black Or 5 parts Rose Pink, 2 parts Orange, 2 parts Red, 2 Parts Black

MELON: 1 part orange and 3 parts bakers rose

MISTY GREEN: Leaf Green, Royal Blue and a touch of black

MOSS GREEN: violet and lemon yellow Or 2 parts Violet, 3 parts Lemon Yellow

MULBERRY: Rose with a touch of Royal Blue

NAVY BLUE: Royal blue and black Or 1 Part Sky Blue, 1 part Violet

PERIWINKLE: Blue and purple

PERSIMMON: 1 part orange and 1Part bakers rose

PLUM: 1 part Violet, a touch of Christmas Red

RASPBERRY: Pink and Red Red Or 3 parts Rose Pink, 1 part Christmas Red

RUBY RED: 1 part Red Red, a touch of Black

RUST: Orange, Red Red and Brown Or 8 parts Orange, 2 parts Red Red, 1 part Brown

SEA GOLD ( SEA GREEN): 2 parts Sky Blue and 1 part Leaf Green

SILVER: We do not advise attempting to simulate silver color in icing. Instead,
               add silver leaves or other silver accessories to the cake.
               Or 1 part Black, 1 part Blue

SKIN TONE: 12 part Orange and 4 part Bakers Rose and 1 part Royal Blue

TEAL: Use teal paste color or lemon yellow and sky blue Or 9 parts Sky Blue, small amount of Lemon Yellow

TURQUOISE: Sky Blue and Lemon Yellow Or 6 parts Sky Blue, 1 part Lemon Yellow

WARM GOLD: Use Golden Yellow with just a touch of brown

WINE: 3 parts Christmas Red and 2 parts Rose Pink


Keep in mind that some colors are already available in the market. For example, Wilton  has
a beautiful Moss green.  Sometimes the base on some colors is different. Once I bought  a black
from Wilton that gave me a base of green instead of grey.

Just play with your colors and have fun with them.  Sometimes there is more than one way to
achieve the same color. You can try it on a small batch of buttercream to make sure
is the right shade you are looking for.

And never forget...Buttercream turns darker as it dries. A perfect shade of  deep red
on a non-crusted buttercream, can turn almost a burgundy once it's dry. If you are not
sure, spread some on a plate and let it dry before you put it on the cake.

As for fondant, the tendency is to dry in a lighter color.

Hope this helps!


Edna De La Cruz- 2010- All rights reserved.
Edna's Website- Design Me A Cake

Photography and Material in this post by Edna De La Cruz.
This may not be reproduced without permission from the author/photographer.

Monday, January 4, 2010

How Mara Tirado Makes a Purse!!

To make it easier, start with a book pan. I got my smallest one from Fiesta Cakes. Using a book pan keeps you from haing to trim cake. I hate doing that, too much waste. If you don't have a book pan you can use a round, square, anything you have to make your purse cakes.

As you can see they have a "natural" purse-y shape...just close your eyes and add the handle or strap...lol

Here is my baked cake. turned out from the pan. Frozen for about an hour to make any cutting and or trimming easier.

I cut my cake in 1/2

Here is the cut, straight down the middle.

Stand one 1/2 on your board.

Put your buttercream filling on the other 1/2 and sandwich them together tightly, I use a round tip to go around the join to make sure my buttercream is filling all the nooks and crannies. Then ice the cake with your favorite buttercream.

Sugar Craft Gun...A Cake Decorators BBF! I used the the disc shown to make my "cord". You extrude it and hold one end while you roll the other end up or down...pick a direction and stick to it. It will look like a braided cord.

Cord, Flap and zipper attached. I'm sure that you guys know how to ice and cover a cake with fondant? or you can just do a butter cream cake and pipe on the details.

Here is what the cake looks like. Nothing fancy, but feel free to let loose when you do yours. You can quilt it, paint it, add fondant circles, stripes or shapes, whatever your little heart desires. Or your customers desire. lol

Use 18g wire. and 2 coffee straws that you will cut in 1/2 to get 4 pieces. ( my wire here is bent. Use new wire that's not bent.

make 4 small balls of fondant.

place the 4 small balls of fondant where you think you would like the handle of your purse to be.

Push the cut coffee straws into the balls and into the cake, leaving a little bit of the coffee straw exposed.

Make a fondant sausage. Not to much or you will have a great big chunky handle.

Thread the wire into the sausage that you made. Slip the fondant sausage toward the middle of the wire.

Roll the threaded fondant sausage out to make the handle the lenght you like. Keeping your sausage as even as possible.

Ok, this was supposed to be a video. While holding both ends in your hands, you first bend one side gently, then the other...making a sort of rocking motion...down and up. You keep doing this until you have the "U" shape of a handle. You leave some of the 18g wire exposed on eighter end so you can place it into the coffee straws that are embeded in the fondant balls on the purse. As you can see the ends of my sausage come to a bit of a point.

Push the handle into the coffee straws, pushing the exposed coffee straws into the cake, through the balls that you have placed on the cake. I like to taper the ends of my sausage a bit to make a more "refined" handle. Make the second handle if you like, or you can just use one. This is the way you can make a purse cake, quickly and not have to worry about letting the handles dry for 3 days or more!


Photos, patterns and tutorial by Mara Tirado, 2009 all rights reserved.
This tutorial was used with the expressed permission of Mara Tirado of Heaven Lee Cakes and may not be reproduced without written permission from the author.

Search This Blog

The Tutorials This Week Were Generously Shared by

RHONDA CHRISTENSEN, EARLENE MOORE, BOBBIE NOTO, EDNA DE LA CRUZ & TONI BRANCATISANO

And to ALL of our Readers...

Above all, have fun and keep baking!

Think CHOCOLATE!

A Very Sweet Tutorial by Bobbie Noto

A Very Sweet Tutorial by Bobbie Noto
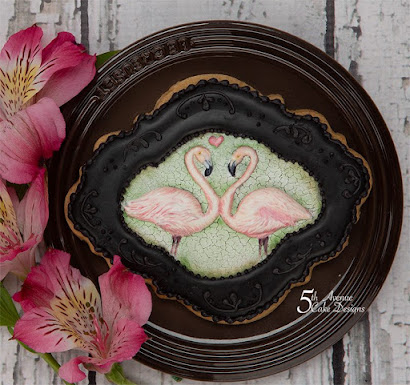
I was instantly in love when Bobbie Noto shared this cookie with SugarTeachers! She is an amazing talent. For instructions on how to create this adorable cookie, click on the photo and don't forget to subscribe to Bobbie's website!

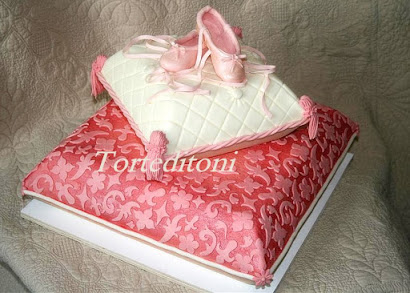
Pillow Cake Tutorial by Toni Brancatisano

Pillow Cake Tutorial by Toni Brancatisano
How beautiful! A great tutorial shared byToni Brancatisano. Click on photo to see the tutorial!

Pistachio-Cardamom Cake

Pistachio-Cardamom Cake
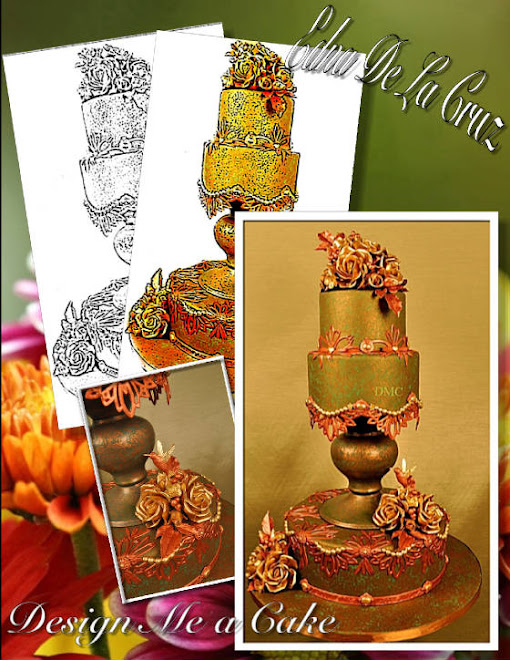
Click on link for Edna De La Cruz's dee-lish cake recipe.

Related Posts with Thumbnails