One thing I love as a baker is when the layers come out of the oven, not only
evenly baked, but level too!
Through the years, from here and there, I have picked up a few great tips
for baking those even layers. Through teachers, books, the internet and even Mom, I
have garnered a few tips along the way.
Hopefully these tips may help you become a happy baker too!
Hopefully these tips may help you become a happy baker too!
I start by cutting parchment paper to fit the inside of the pan. Using parchment paper helps keep the bottom of cake from baking too dark a crust, releasing the cake from the pan very easily.
Directions Here
for correctly cutting parchment liners.
for correctly cutting parchment liners.
Another tool I use is Baking Strips.
Before mixing the batter, just soak the strips in water for about 1/2 hour, then wring out excess water. These will be wrapped around the perimeter of the pan and will help to bake very even layers without humps.
The third baking tool that is essential for even baking is a heating core, especially when the cake pan measures 10" or more.
There are two type methods to ensure even baking in the center of your cake layer.
The first way uses a commerical heating core.
You can find these anywhere that sells Wilton supplies.

- Prepare the pan and the heating core by either greasing the bottom and sides with vegetable shortening, then flouring the sides lightly; (or spray the bottom and sides with a prepared baking spray, such as Bake Easy, Baker's Joy with Flour, Baking Pam with Flour.)

2.Place a precut parchment paper over the bottom of pan. Grease or Spray the parchment paper lightly and place the prepared (greased and floured) heating core in the center of the pan.

3. Wrap the pan with damp Baking Strips, and secure with pin.

4. Pour the batter into your pan evenly, as well as into the heating core.
The second way to add a heating core to your pan is to use
an inverted stainless steel Flower Nail.
1. Grease and flour pan...or spray with Baking Spray.

2. Push Flower nail into the center of precut parchment paper.

3. Place on bottom of pan, and lightly grease or spray parchment paper and flower nail.

4. Pour the batter evenly in pan, already prepared with secured dampened baking strip.

5. Bake the cake layers in oven, leaving plenty of space for even baking air flow.
No matter what the recipe says, for the average cake, I check at 28 minutes.
Most cakes are fully baked with the 28-30 minute time frame, depending on the size and depth of the pan, as well as the density of the recipe.

6. When cake layers are fully baked, remove from oven onto a baking rack.


After about 5 minutes, remove the heating core by lifting out of the center.

Cover the pans with waxed paper and invert onto baking rack to cool completely.

Once the layer is inverted, lift the flower nail from the center.
The parchment paper enables the removal without destroying the center of the layer.

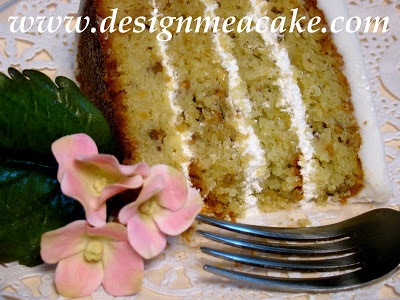
Allow the layers to cool completely. See how beautifully even they are?

Place the cake from the heating core in the center, then cut even with
the height of the layer.

This is a german chocolate cake.
Once completely cooled,it will be filled with coconut pecan filling.
No leveling needed, nor humps cut from the middle.

Once filled, it was iced with a milk chocolate ganache.
After chilling well, the cake was glazed with a bittersweet ganache.


So by adding a few steps at the beginning,
I was able to eliminate a few messy steps before stacking the cake!
Happy Baking!
Tutorial and Photos
by
Jacque Benson
2011
All Rights Reserved
This material may not be republished or reproduced in any manner without the expressed permission of the author.
Happy Baking!
Tutorial and Photos
by
Jacque Benson
2011
All Rights Reserved
This material may not be republished or reproduced in any manner without the expressed permission of the author.